Monday, 16 June 2025

Gingerbread

I have spent decades planning to make Gingerbread and never got around to it. This month I decided to take action and the first place I looked was the recipe book I bought in Australia and is produced by Buderim Ginger. It was amazingly simple to make and tasted delicious so I have no need to search for any other recipe. If I can share the love and flavour of ginger then I am pleased to share this recipe. I only made one amendment and that was to add a little extra source of ginger!  I totally forgot to take a photo when I baked it; I was too busy eating it but I did manage a quick photo of the last piece before it was devoured ... oops!


Ingredients:

125g butter

125g soft brown sugar

125g black treacle

125g golden syrup

150 ml full-cream milk

250g plain flour

3-4 teaspoons ground ginger (I used 4 teaspoons as I love ginger)

1 teaspoon bicarbonate of soda

1 large egg, beaten

I added one ball of  preserved stem ginger in syrup, finely chopped

Makes 16


Method:

  • Grease and line a 20 cm square cake tin. 
  • Melt the butter, sugar, treacle, syrup and milk in a saucepan over a low heat, stirring all the time. Remove from the heat and allow to cool until lukewarm.
  • Sieve the dry ingredients and stir into the liquid.
  • Beat in the beaten egg, mixing until smooth, then spoon the mixture into the prepared tin ( poured it in as too runny to spoon without making a big mess)
  • Bake in a preheated oven at 150°C (300°F) Gas Mark 2 for 1 1/4 - 1 1/2 hours until cooked, or when a cocktail stick is inserted and comes out clean.
  • Cool for 5 minutes on a wire rack, then turn out of the tin onto the rack and cool completely.
  • Cut into 16 pieces and serve immediately or transfer to an airtight tin and eat within 1 week (if you can restrain yourself that long)
I have never considered myself to be a baker and my cakes are never very light; but this is so simple. There is no labour intensive creaming and beating and folding and no opportunity for things to go wrong. Just melt, mix and pour. It has been a great hit with friends and family and was the first baked good to disappear from a sharing cake stand at a social event where this was my contribution. 

Monday, 12 May 2025

Sweetcorn, Jalapeno & Red Pepper Chowder

 This recipe is originally from a Waitrose magazine and I am so glad that I read a copy belonging to a  friend or I would never have discovered this delicious chowder.  It is just like eating a rainbow and I feel invigorated just looking at the colours:


This soup is my all time favourite and I am a great lover of soups. For me it ticks all the boxes as it is full of healthy veg and has a definite kick to it. Perfect for cold winter days but just as good as a light summer snack. If you don't like things too spicy, just reduce the amount of jalapenos. As I've got used to this recipe over the years I have adjusted things a little to suit me on the day that I'm making it. If I haven't got a red pepper I add whatever colour I do have and sometimes even mix it up a bit with a selection of colours. I promised a friend that I would give her this recipe after she tried the soup; and put myself under pressure to make it again in order to take photos. This time I even mixed up the colour of onions. My personal rule is always to follow a recipe completely the first time and then do what you like next time and see what happens.

This recipe supposedly serves 6 but it very much depends how big a portion you want .. and I love soup!

Ingredients:

  • 1 tbsp olive oil
  • 1 onion, finely diced
  • 2 cloves garlic, crushed
  • 1 small red pepper, deseeded and finely diced
  • 20g jalapeno peppers, drained and finely chopped
  • 2 sticks celery, diced
  • 400g Maris Piper potatoes (I use whatever I have), peeled and diced into 1cm cubes (I don't peel mine unless the skins look particularly unsavoury)
  • 500g pack frozen sweetcorn (I use a 400g tin as I don't have freezer space to keep frozen)
  • 1 litre vegetable stock
  • 1 tsp sea salt (I only add a small amount as I find shop bought stock can be quite salty)
  • 500ml milk
  • 2 salad onions, ,sliced 3mm thick

Method:

1. Warm the oil in a large saucepan over a medium heat. Add the onion, garlic, pepper, jalapeno and celery and sauté for 4-5 minutes, until the onion becomes translucent and tender. Add the potatoes, half the sweetcorn and the stock. Bring to the boil, then cook, uncovered for about 15-20 minutes, until the potatoes are tender. Meanwhile defrost the frozen sweetcorn if using.

2.  Put the defrosted corn in a blender with the salt and milk, then blend until smooth. Add roughly 500ml of the soup to the blender and whizz again until roughly blended.

3. Pour the mixture back into the pan of soup, bring to a simmer, and cook for 5 minutes. Ladle into bowls, then garnish with the salad onions and some freshly ground black pepper.


If you want to make it more of a meal or just fancy some fish add some pieces of fish at step three and cook until fish is cooked through/opaque. 

I sometimes steam a fillet of smoked haddock separately and just break it up into the soup in the final few minutes. But you can add a mix of assorted fish/seafood.

Monday, 10 April 2023

Anchovy Bites

Whenever we eat in fancy hotels I always love the canapes that are served before dinner and decided that it must be possible to do something similar at home that wasn't too complicated. The next stage in this process was finding something to use the fish shaped pastry cutter that I bought on a trip to Norway and had never used. It made perfect sense to combine the two and make anchovy bites. Many years ago I had made these tiny delights and couldn't find the recipe. I referred to Google and found a variety of similar recipes that were all in American cup quantities so I played around until I could make it more UK metric compatable. They were a great success and even if you don't like anchovies I would defy you not to love these.


Ingredients:

  • 120g plain flour
  • 115g cold butter
  • 115g cheese, grated
  • 45g anchovies, roughly chopped
  • 50g pitted olives, chopped
  • 1/2 tsp cayenne
Mehod:
  • Put all ingredients in a food processor and pulse to combine until the mixture forms a ball. I found that I needed to mould it by hand at the end to ensure that all was combined. 
  • Turn out and form into a ball and wrap in either cling film or wax wraps and place in fridge to chill for 20 mins.
  • Pre heat the oven to 200*C. 
  • Roll out the dough until thin and cut into 2" strips. Then cut diagonally to make either diamond shapes or triangles. Or use a pastry cutter like I did to make any shape you feel is appropriate. Or you can keep it simple and just make very thin strips. They will taste delicious however you cut them!
  • Place on a baking tray and bake for 8-10 mins until golden. Cool on a wire rack and refrain from nibbling until cool.
The recipes I looked at varied in their choice of cheese but I would guess you can use whatever you like. I wanted a really punchy flavour so used parmesan but some recipes recommended manchego for the traditional Spanish tapas feel or you can stick with reliable cheddar. The world is your oyster ... or Anchovy.

Tuesday, 18 January 2022

Make -Ahead Breakfast Cookies

This recipe was found in a store magazine and although my parents complained that they tasted like cardboard I really enjoyed them. Having recently been told that I need to address my raised cholesterol levels I am in need of a sweet treat that is both tasty and healthy. I don't want to feel deprived of treats and this recipe hits the spot. Although they are described as a breakfast cookie that kids will love they work perfectly well for grown ups with an afternoon cuppa.

This recipe states that it makes 12 but it depends how big you make them. I prefer them a little smaller and then I can have more of them. I can easily deceive myself into believing that I'm having more even if the overall content is the same.


Ingredients:

200g rolled oats

150g plain, self raising or bread flour

2 tsp ground cinnamon (I like to reduce cinnamon and add in ginger too)

1/2 tsp bicarbonate of soda

2 medium ripe bananas, peeled

2 Tbs honey

1 large egg (or 2 small) beaten

50ml olive oil

150g carrots, scrubbed, trimmed and grated

1 eating apple, cored and grated

Method:

  • Preheat the oven to gas 4, 180*C, fan 160*C. Line a baking tray with non-stick baking paper.
  • In a large bowl stir together the oats, flour, cinnamon, bicarbonate of soda and a pinch of salt (optional).
  • In a separate bowl, mash the bananas with a fork, then whisk in the honey, egg and oil. Pour the wet ingredients into the dry and add the grated carrot and apple. Mix with a fork until just combined.
  • Roll the mix into 12 balls (5cm wide); arrange on the baking tray. Press the balls down with your fingers to make a cookie shape.
  • Bake on the middle shelf for 15 minutes or until firm, turning the tray halfway through. Transfer to a wire rack to cool. Store in an airtight container for up to 3 days, or in an airtight bag in the freezer for up to 2 months.

Since first making these I have played around with the ingredients a little. Adding half a dozen dates adds sweetness, taste and another of your five a day! I also substituted 50g of flour for ground almonds in an effort to increase my good fat intake. Feel free to make your own adjustments.

Friday, 10 December 2021

Piccalilli

I love piccalilli but had never thought about making my own until two years ago when I realised that I hadn't bought any for Christmas and couldn't face going into a supermarket again prior to the big day.  And then my love for Piccalilli grew as I discovered that the pickle I could make was far superior to anything I bought in a jar.  Like all my recipes I have amended it each time I made it because I had set my mind to making it and didn't have all the listed ingredients. I've discovered that this recipe allows for variations depending on personal taste or vegetable availability. I've even played around with spices a little and added a few of my personal favourites. This could just be the start of a pickling adventure for you. The first time I made it I used broccoli as I didn't have cauliflower and fine beans instead of runner beans. The footnote on the recipe suggests that some people add carrots but that doesn't appeal to me.  

One thing I have found is that I like to cut the vegetables into smaller pieces than advised in the recipe. It would be fine in larger chunks if you're only going to eat it with cold meats as a vegetable in its own right. However, if you're going to balance it on crisp bread with slices of cheese the large chunks fall off and the turmeric will stain your clothing as it hurtles downwards!


This quantity makes 2kg (4 1/2 lb) and supposedly keeps for 6 months but mine has still been fine to eat almost a year later. I have also made half the quantity when I didn't have a large preserving pan and used a large stainless steel saucepan.


            Ingredients: 

  • 225g / 8oz salt
  • 450g / 1 lb pickling onions
  • 1 medium cauliflower, broken into small florets
  • 225g / 8oz runner beans, sliced into 2.5cm / 1 inch lengths
  • 2 ridged cucumbers or courgettes, diced
  • 2 head of plump garlic cloves (I like to slice mine)
       For the Sauce:
  • 30g / 1oz plain flour
  • 60g / 2oz mustard powder
  • 225g / 8oz white granulated sugar
  • 1 Tbsp ground turmeric
  • 750ml / 1 3/4pts distilled malt vinegar, plus extra if needed. 
        Method:
  • For the brine, put the salt in a large china or glass bowl. Pour over 450ml / 15 fl oz boiling water and stir to dissolve the salt. Add a further 1.7 litres / 3 points cold water. Add the prepared vegetables and leave to soak overnight. (I place a plate over the veg to keep them submerged under the brine).
  • For the sauce, combine the flour, mustard, sugar, and turmeric in a large bowl. Add a little of the vinegar and work into a paste, adding more vinegar if required. Mix in the remaining vinegar, and pour into a large preserving pan.
  • Bring the mixture to the boil, whisking constantly. Continuing to whisk, simmer for 4-5 minutes until the sauce is thick and smooth. Remove from the heat
  • Rinse the vegetables and drain well. (I have found that rinsing thoroughly is essential and now do it once more than I think is necessary. The time I didn't do this the resultant pickle was far too salty)
  • Add all the vegetables to the sauce, bring back to the boil, and simmer for about 3 minutes until they are cooked but still a little crisp.
  • Pot into hot sterilised jars, pressing the vegetables down to ensure that they are covered, and adding extra vinegar if needed. Seal with vinegar proof lids and label. 


It is best left for a month to allow the flavours to develop and mature ... if you can wait that long.

I hope that I have inspired you to start your own pickle adventure. Next on the list for me is pickled onions and maybe a ploughman's pickle 

Monday, 30 August 2021

Easy Kedgeree

Today I have been asked for my kedgeree recipe; and as I had already cooked and eaten it last night there are no photos as I didn't anticipate blogging about it. This recipe is an old one from a Somerfield magazine and truly is quick and easy. Having looked at other recipes I am tempted to try them to see how much the flavour differs with such intensive preparation and attention. The original recipe also advises using prepacked rice which would be excessively quick and easy; but I am on a plastic free mission so I avoid all packaged products where-ever possible. My measurements will always be variable as I have strayed from following the recipe explicitly.

Original recipe for four people

Ingredients:

  • 1 onion, finely chopped (I use a whole onion for 2 people)
  • 10 ml oil (recipe says olive but I'm currently using rapeseed ... use what you like)
  • 250g / 9oz smoked hadddock (or use whatever you consider to be the right portion size for your appetite. I just look at the size of the fillet and decide on the day what I feel like)
  • 2 x 250g packs of rice (I use 2oz of uncooked rice per person)
  • 15ml / 3 tsps curry powder (adjust to taste, I like a kick so use this amount for 2 people)
  • 2 eggs (I use 1 egg per person)
  • 30 ml creme fraiche (if not in the fridge I substitute yoghurt or sour cream .. or even kefir)
  • 15ml / 1 Tbsp chopped coriander
Method:
  • If not using packs of rice prepare and cook rice according to pack instructions ( I always steam mine in a steamer and add the haddock in a top layer for the second half of the time along with the eggs to cook. This saves additional pans being used.)
  • Fry finely chopped onion in oil with curry powder until soft.
  • If not steaming haddock with rice place the deskinned haddock in a pan with a little water or milk, cover and poach gently until cooked (time varies depending on thickness of fillet; approx 7-10 mins). Once cooked drain and flake
  • Hard boil the eggs if not already cooking
  • Once the onions are soft mix the rice into the pan with the onions and add the haddock, creme fraiche and coriander. Season to taste and serve with the shelled boiled eggs cut into quarters and a good squeeze of lemon juic.
Variations: Feel free to add additional vegetables to increase your veggie intake. I like broccoli, spinach, peas or sweetcorn ... just use your imagination or whatever is lurking in the fridge.

The beauty of this recipe is that you can juggle ingredients and quantities to suit your individual taste. Other recipes cook the rice gently with all the other ingredients and a multitude of spices but I find this is simple and doesn't need to be watched constantly. Good Luck and Enjoy!

Friday, 9 April 2021

Roasted Cauliflower with Lemon, Caper and Chilli Dressing

 I grew up eating boiled cauliflower or if lucky cauliflower cheese. It has always looked so anaemic and unappetising. However, the discovery of this recipe has transformed my cauliflower and I now look forward to getting a tightly packed head of deliciousness. Give it a go and see what you think!

From this raw ingredient
Add a colourful zingy dressing
And you get a side dish that can surpass the main feature!

I find that taking photos of my food don't always do it justice. That's not a reflection on the dish but more on my photography skills; plus the fact that the steam rising from the freshly cooked food makes everything look a little blurry.

Ingredients:
  • 1 Cauliflower, cut into florets
  • 4 Tbsp extra-virgin olive oil
  • 1 lemon, zested and juiced
  • 1 red chilli, deseeded and finely chopped ( I like the heat so leave a few seeds in, adjust to taste)
  • 2 Tbsp capers, rinsed and drained
  • Handful flat-leafed parsley, chopped
Method:
  • Preheat the oven to gas 6, 200*C, fan 180*C. Toss the cauliflower florets with 1 1/2 Tbsp of the olive oil and spread them out over a large baking sheet. Season well, and then roast for 25 minutes, or until golden.
  • Meanwhile, in a bowl, combine the remaining olive oil with the lemon zest and juice, chilli, capers and most of the parsley. Season with some freshly cracked black pepper.
  • Arrange the roasted cauliflower in a serving dish. Pour over the dressing and toss to coat. Serve warm scattered with the remaining parsley
Go on ... Try it!

Tuesday, 9 March 2021

Versatile Versailles

 I have spent far too long this week playing around with inks and stamps. I've never been so obsessed with experimenting with a particular set as I have been this week. Today it was the turn of Very Versailles from Stampin' Up. I needed to make a New Home card and when I sat down to create the only starting point I had was a woodchip house from Kaisercraft. I stared at the desk for ages before then staring out of the window, and began to despair that I would think of anything. Inspired by Pinterest I had wanted to try stamping in a monochrome background effect leading onto a coloured version on a different mount. This was the opportunity to try. 

Another time I might stamp more on the background as most of it is hidden but I still like the effect. I also like the Stampin' Up embossing folder. Kaisercraft blooms added an extra bit of colour and a spring like feel.


I'm pleased how this turned out. Now I need somebody else to move house so I can make another one!


A little Addicted to Green

Having got out my green inks for a previous entry in this week's Fusion Challenge I decided to play around with another Stampin' Up set. With more time on my hands I have indulged in buying two new stamps sets and today was the perfect opportunity to experiment with Very Versailles. 

I got a little carried away with this wonderful set but sometimes the simplest designs are the most effective. I love how simple this leaf design is and was very impressed with the way that the leaves were easily brought to life with a little ink and a blender pen. I love Stampin' Up Lemon and Lime Twist ink and was pleasantly surprised at how the colour altered it's effect when blended into the veins of the leaves. 

This card may not showcase a variety of greens and I have not attempted to follow the sketch but I think it still fits the green category. Maybe tomorrow I'll see how different the same design looks in a different colour palette. 

A little more blending and fussy cutting and the frame came to life. All in all a very versatile card. This one is destined to send Mother's Day love but would be perfectly suitable for any occasion.


Saturday, 6 March 2021

Green Fusion Challenge

 I always need a little direction or guidance rather than staring at all my craft supplies and wondering where to go next. The Fusion Card Challenge gave me that nudge today. I paid homage to the sketch and used a selection of green inks from Stampin' Up and Kaisercraft. The stamps are my latest love 'Enjoy the Moment' set. The die is one I haven't used before but I found it lurking in my cupboard from a moment of mad internet shopping. It didn't quite work out how I envisaged in my head but I'm happy with it and I'm sure the recipient will appreciate the sentiment.


Thanks for stopping by.

Friday, 5 March 2021

Enjoy The Moment

I have been spending a little too much time on crafting this week and the blame can be laid completely at the door of Stamping Up. I ordered a new stamp set and have got a little carried away. I love the botanical elements and the sentiments are spot on for this collection called Enjoy the Moment.

I was inspired by other designs by friends and spotted on line but ultimately everything always turns out with an individual twist by the very essence of my inaccurate cutting and sticking.


I started simply with just one stamp and got to grips with how it felt and coloured.

Two similar designs but different sizes and finishing touches

My personal favourite involved stamping a sheet of pattern and then dividing into strips 


A final effort for today was a birthday card


I'm getting to grips with how the stamps work with different colours. I think I may try using stazon next time to give a clearer outline and allow for more obvious colouring in for depth. Maybe even a little resist heat embossing. I'm still really excited to spend more time exploring all possibilities.

Saturday, 20 February 2021

Card Challenge

It's been a long time since I took part in any challenges and I thought that I would try and kick start my mojo with trying something more personal than following layouts and styles of others. Discovering Fusion Card Challenge was an unexpected surprise. Having created a card using a previous week's challenge I decided to bite the bullet today and actually do a challenge in 'real time'. 

I wasn't quite sure where to start but decided to concentrate on the rainbow theme and progressed to utilising the layout sketch too. I'm pleased with the result and that's the most important thing. Thank you for giving me the push that I needed to be creative.


Monday, 18 January 2021

Easy Marmalade

When I retired I became a little obsessed with preserving and pickling and finally had the time to make marmalade in the way I had watched my grandmother do as I grew up. I studied various recipes, as is my wont, and finally settled on the one with the least faff involved. Now in my third year of making marmalade I have tried a couple of other recipes but still keep coming back to the one that I find the easiest. Why make a project harder than necessary? Although the original recipe came from the book: 'Jams and Chutneys by Thane Prince' I have amended it a little as I found the quantities a bit too unpredictable. They stated 7 Seville oranges but how big is an orange? This year the oranges were much smaller than those I've used previously. Therefore I have merged the recipe with one I have also used from Riverford which gives specific weights. I have also found it beneficial to have a formula for calculating how much sugar is needed in relation to the liquid yielded.

Ingredients:

  • 1.5kg Seville oranges
  • 2 lemons
  • 1.8kg granulated sugar
Method:
  • Scrub the fruit and place in preserving pan with enough water to cover fruit (I used 2.2 litres of water). 
At this stage I boil the fruit in a large stockpot which seems to prevent too much evaporation, uses less space on the hob and also my preserving pan doesn't have a lid!
  • Cover, bring to the boil and simmer for 50 - 60 minutes until the fruit is very soft. Remove from the heat, lift out the fruit and allow to cool.
  • Meanwhile measure the liquid and make up to 2 litres with water. Pour into the preserving pan and stir in the sugar.
  • Recipes vary in whether to mince, chop or slice the fruit and flesh. I like to cut into quarters and then scrape out the bulk of the flesh and pips and add to a muslin bag. I have tried tying a muslin square with string but now I use a jelly bag and just adjust the size by twisting any spare fabric. I then thinly slice the quartered fruit. I have found that stacking two or three pieces together makes this a little quicker.


So many people comment that making marmalade is time consuming and hard work. I actually find that slicing the orange skins is a very mindful activity and for me it is a vital part of the magic in creating sunshine in a jar.
  • Add the sliced fruit to the preserving pain with the bag of pips and flesh. Stir over a low heat until the sugar has dissolved.
  • Increase the heat and cook at a full rolling boil for 10 - 15 minutes until the marmalade has reached setting point. I have found that this takes much longer than anticipated but it may be due to my very old aluminum pan and I hope that a shiny new stainless steel one will hold the heat better. Keep testing for setting point every 2-3 minutes until achieved.


 I'm not going to go into the details of how you check for setting point, I suggest you google the different methods. Suffice to say that I am an old fashioned girl and use the cold saucer wrinkle test that was good enough when I was at school and is still reliable today. I don't need fancy thermometers or anything more complicated than a saucer and freezer.
  • Remove the muslin bag and squeeze out any liquid as it is rich in pectin. Pot the marmalade in sterilised jars, seal and label. 
  • This year I made a variation in adding 80ml of Amaretto to the pan and stirred through prior to pouring into jars.

If you find that you have differing quantities of liquid you can adjust the amount of sugar  proportionately. The principle is that for every 500ml of liquid you need 450g sugar. With this knowledge you can play around with any ingredients and create your own little jar of sunshine.

I hope that you find this as easy and tasty as we do. You need to like a bitter marmalade to enjoy this, but that is exactly what I like about it. If you'd rather have something less bitter substitute a couple of Seville oranges for sweet oranges.  Watch this space for another post featuring grapefruits. I discovered pink grapefruit marmalade last year and now I am a convert. Although there may be dozens of different recipes out there I can't imagine myself ever deviating from this tried and tested delight.

Saturday, 9 January 2021

Pea and Lettuce Soup

 At this time of year I love nothing more than a warming soup and I am not impressed at the thought of being given salad ingredients in my vegetable delivery.  I received a lettuce at Christmas and could not face the thought of serving it as a lone ingredient. Therefore I was thrilled to find a recipe for soup using an entire lettuce. The perfect combination of creating a lush soup with an otherwise unwanted ingredient. 

No matter how unusual it may seem I would say take the plunge and give it a go ... you won't regret it!

Serves four

Ingredients:

  • 15g butter
  • 1 Tbsp olive oil
  • 3 shallots, finely sliced
  • 3 garlic cloves, sliced
  • 1 large round lettuce, leaves separated and roughly chopped
  • 400g frozen petit pois (I used normal frozen peas with no obvious ill effects)
  • 1 vegetable stock cube, made up with 900ml hot water
  • small handful fresh mint leaves
  • 4 eggs
  • small handful fresh dill, leaves picked.
Method:
  • Melt the butter with the oil in a large saucepan over a medium heat and add the shallots and garlic. Fry for 5-6 minutes until tender but not brown. Stir in the lettuce and, when it has wilted, add the peas, stock and mint. Bring to the boil. Reduce the heat, season and simmer for 7-10 minutes, until thickened slightly.
  • Remove from the heat and blitz the soup with a stick blender (I have done this and I have used a liquidiser; both are effective). Season
  • Meanwhile, bring a large pan of water to a simmer. Make a whirlpool in the centre by stirring rapidly with the handle of a wooden spoon. Allow the swirl to almost subside, then crack the eggs directly into it. Poach for 3 minutes over a low heat. Remove the eggs with a slotted spoon; set aside.
  • Divide the soup between 4 bowls and top each one with a poached egg and some dill leaves.


The first time that I made this I added eggs but had no dill. The second time I made it as a quick lunch and didn't have any eggs so served the soup as it was and found it just as enjoyable.  I would urge you to give it a go and amend it as indicated to suit your needs and the contents of your fridge.

Thursday, 3 December 2020

Aloo Gobi Soup

With 11 months of new recipes behind me I am making headway in trying out the recipes torn from magazines in previous years. Today I tried Aloo Gobi soup torn from a Tesco magazine and I am not disappointed. Easy to make with store cupboard ingredients and very tasty. 

The recipe states it serves four but with the large portions I served today as a complete meal it would only serve three. A normal sized portion at lunch would serve four perfectly.  I also found that some of the timings were not quite sufficient for complete cooking so I've made notes and suggest you listen to your instinct and test consistency before moving onto next step.


Ingredients:

  • 2 maris piper potatoes (about 200g) cut into cubes
  • 2 Tbsp olive oil
  • 1 onion, finely chopped
  • 1/2 head of cauliflower (about 200g), roughly chopped into small florets
  • 3 garlic cloves, sliced
  • 1/2 red chilli, deseeded and finely chopped
  • 5cm piece ginger, peeled and grated
  • 1 tsp ground cumin
  • 1 tsp ground turmeric
  • 1 Tbsp tomato puree
  • 400g chopped tomatoes (I didn't have any so used passata)
  • 1 vegetable stock cube, made up with 500ml water
  • 100g Greek style yoghurt ( I used feta cheese)
  • 1 tsp nigella seeds (I didn't have any so used cardamom seeds)
  • handful fresh coriander, finely chopped
Method:
  • Bring a saucepan of water to the boil, add the potatoes and simmer for 8 minutes until just soft. Drain and set aside.
  • Meanwhile heat half the oil in a large, heavy based pan over a medium heat. Add the onion and cook for 3-4 minutes until it begins to soften. Stir in the cauliflower, garlic, chilli and ginger. Cook for 1 minute and then add the ground cumin and turmeric. Fry for 2 minutes, then cover and reduce the heat to low. Cook for 5-6 minutes (or longer) until soft.
  • Remove the lid and stir in the tomato puree and chopped tomatoes. Bubble over a medium heat for 6-8 minutes (I found it took longer) until thickened. Stir in the stock and half the cooked potatoes. Remove from the heat and blitz with a stick blender until smooth (or you could use a food processor). Stir through the yoghurt and return to the pan on a low heat. Season.
  • Meanwhile, heat the remaining oil in a small frying pain over a high heat. Add the reserved potatoes and fry for 4-6 minutes turning frequently, until golden and crispy. Remove from the pan with a slotted spoon and set aside to drain on kitchen paper. 
  • Serve the soup on bowls, scattered with the potatoes and topped with the nigella seeds and coriander.

Tuesday, 10 November 2020

Warming Winter Sausage and Apple Bake

This recipe was one that my grandparents made and has never been written down. I haven't cooked it in years and when I made it today I wondered why it had been so long. I was given a glut of home grown cooking apples and thought of as many ways to use them as I could.

The quantities are variable and feel free to adjust them to suit you.

Ingredients

  • 1 pack of sausage meat
  • 1 large onion, finely sliced
  • 1-2 cooking apples, peeled and sliced
  • Enough potatoes to mash and cover your baking dish (I'm not good on weights)
Method:
  • Cut the potatoes and cook until tender, then season and mash. Meanwhile:
  • Press half the pack of sausage meat onto the base of a casserole dish or baking dish.
  • Spread the sliced onion evenly across the sausage meat to cover the dish.
  • Dot the remaining sausage meat over the onions.
  • Arrange the sliced apples over the mixture to completely cover the meat and onions. Top with the mashed potato, place in the oven and cook 35 minutes until golden.
Serve with whatever accompaniment you fancy. We had stir fried cabbage and carrots but baked beans would also go well.

It might not look the most attractive meal but it's a tasty supper which is perfect for an Autumn evening


Sunday, 8 November 2020

Best Christmas Pudding Ever

I spent most of my life never venturing into the world of puddings. I must admit that I've never really liked Christmas pudding. In my view it was dark and bitter and had none of the enjoyment I've experienced in a Christmas cake. And then I had a revelation when we visited Australia over Christmas and their pudding was a whole different ball game. It was light and delightful (although I wasn't so keen on it being served with cold custard). And so began the mission to find the right recipe.

I have made Christmas cakes since my 20s but some-how I thought puddings were too complicated.  How wrong I was!  My first attempt I scoured the internet for lots of different recipes. I followed recipes by both Jamie Oliver and Nigel Slater. This involved a lot of pudding eating to make a final decision. The first year I made them we enjoyed both but by the following year we had forgotten which we preferred. Then followed more pudding tasting. I made both in various sizes and then we cooked portions of both and tasted together to compare. The third year I decided to mix and match the best of both and create my own. 

This year I have also increased the mixture size so that I can create more loveliness to last me through the year. My recipe is predominantly inspired by Jamie Oliver but has a distinct ginger twist. His recipe is intended to fill one large 1.5 litre pudding bowl and I prefer a selection of smaller ones. Therefore instead of one large pudding I have increased the ingredients by half again and made three puddings. The saying goes that a dog is not just for Christmas and I believe the same applies to puddings!


  • Ingredients:
  • 250g raisins
  • 250g sultanas (possibly add more if you feel it's not dense enough)
  • 80g cherries
  • 100g apricots
  • 100g cranberries
  •  160g dates
  •  100g finely chopped crystalised ginger
  • 180g plain four
  • 150g fresh bread crumbs
  • 185g suet ( used whole 200g pack)1
  • 175g golden caster sugar
  • 80g macadamia nuts (or mix with almonds)
  • 2 eggs
  •  200ml milk (or adjust according to texture)
  •  Zest of one orange
  • 1-2 tsp ground ginger (add whatever spices tickle your fancy)
  •  Pinch of salt
  • 140ml ish of alcohol (your favourite liqueur, mine is amaretto)

Method:

·         I like to soak all the fruit overnight with the alcohol … don’t worry if you leave it longer. Chop the dates and apricots. I also like to cut the cherries so there are more pieces in each mouthful.

·         Start by greasing your pudding basin with a knob of butter. I found that these quantities made three 2-pint puddings with basin filled ¾ full; or one 2pt basin and two 1pt basins filled to brim.

·         In a bowl beat the egg and milk together and put aside.

·         In a large bowl mix all the other ingredients together. Pour the egg and milk mixture into this bowl and stir or mix with your hands until everything is combined.

·         Spoon this mixture into the greased bowls and cover with a layer of buttered greaseproof paper. If steaming without specific designed lids add a double layer of foil and secure these layers around the rim of the bowl using a piece of string. I use purpose made basins with lids.

·         Place the bowl (s) in a large saucepan and pour cold water into the pan until it comes halfway up the side of the bowl. Bring the water to the bowl, then cover with a lid and simmer for 2-3 hours. If using a small bowl adjust cooking time.

I use an electric steamer and can fit more than one bowl in at a time. Ensure the pan does not boil dry and top up as indicated. 

·         If storing puddings, reheat for further 2-3 hours before serving. Remove greaseproof paper and turn out. Enjoy with your favourite accompaniment … brandy butter is Jamie’s recommended indulgence; my husband likes brandy sauce and I like custard. Even ice-cream is good but it needs to be a good Madagascan vanilla.

Thursday, 1 October 2020

Oat and Raisin Cookies

I had never made cookies before discovering this recipe and now they are a regular feature in our cake tin. They are simple to make and have been a great success at every event I have taken them to. Although the recipe says to use raisins I often use sultanas as they seem a better size to go in a cookie. I also love ginger and thought how I could adapt the recipe. My friends seem to like the ginger best but it's an easy variation. Once the basics are mastered you can try out any combination of favourite flavours. I'm now thinking about Christmas and maybe cranberry and white chocolate would work; or even orange and dark chocolate ... let me know what you try!


Ingredients:
  • 100g SR flour
  • 100g soft brown sugar
  • 100g butter
  • 100g oats
  • 1 egg
  • 50g raisins (or chopped crystalised ginger)
  • 1 tsp cinnamon (or 2 tsp ground ginger)
Method:
Preheat oven to 180*C / 160*C

Mix the four and cinnamon together in a bowl. 
Cream the butter and sugar until creamy. Add the egg and beat until smooth.
Add the flour and mix well.
Stir in the oats and raisins to make a stiff dough.
Put the dough onto parchment paper, shape into 20cm / 8" cylinder wrap and chill until firm (I have made in advance and left chilled for 24hrs until I'm ready to bake). Lightly grease 2 baking trays.
Cut dough into 7-8mm / 1/4" thick slices and place on greased baking trays, maintaining round shape.
Bake for 18-20 mins.
Cool on baking tray for 3 minutes before lifting onto wire rack to finish cooling.

Allow to cool if you can before tucking in ... be warned, they are very moreish!

Saturday, 23 May 2020

Chimichurri

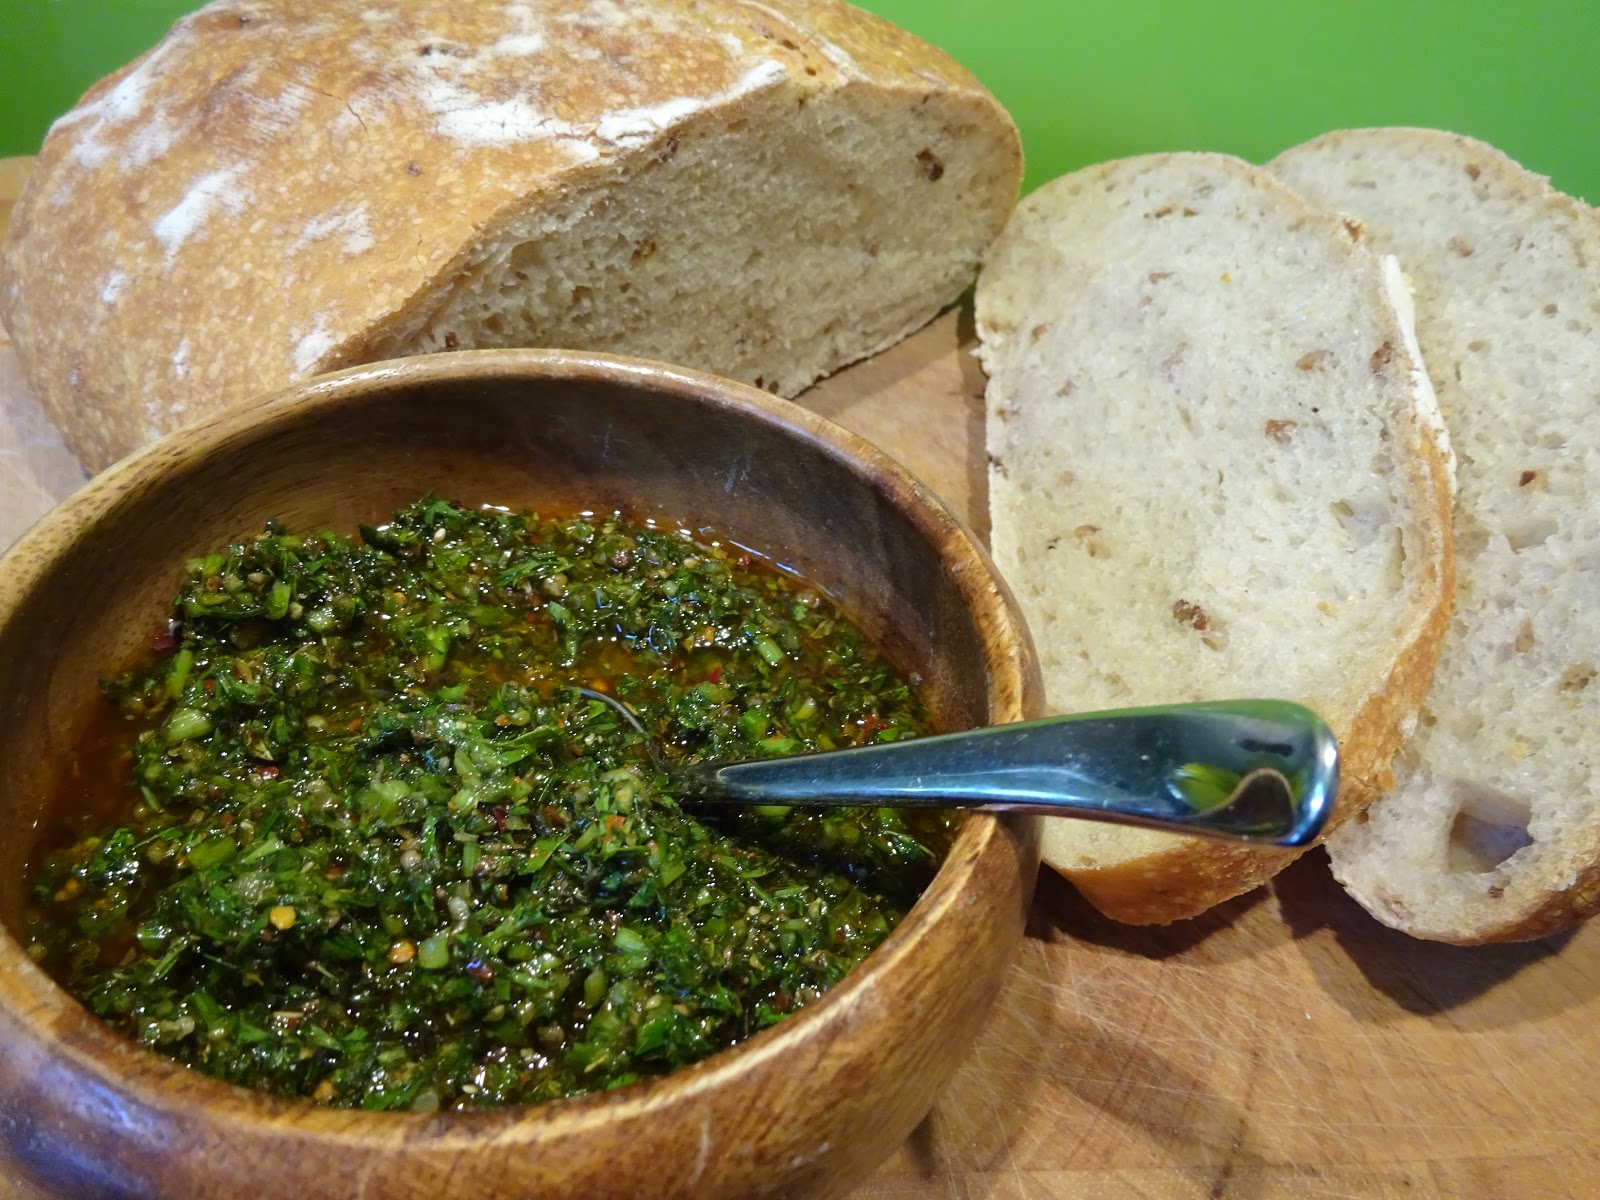
I have been enjoying bunched carrots for decades but until this month I had not considered eating the lush green tops. They have always been donated to a friend's rabbit. Unfortunately the poor bunny will now be going hungry as I have discovered Chimichurri. This is a sauce or marinade that originated in Argentina / Columbia and Uruguay. Traditionally made with parsley or coriander I have discovered a recipe using carrot tops, so ... waste not want not!  As per usual there are numerous versions but this is the one I settled on and I have eaten it every day for two weeks. I may branch out and try a few variations but I'm happy enough with my first attempt. Once the carrot top season is over I shall continue to make it and adjust proportions of parsley and coriander; I may even add in fresh chillies rather than dried.  

All ingredients are store cupboard staples for me so it's easy to knock up in a few minutes and Hey Presto we have a tasty dip ready.


Ingredients:
  • 1 cup finely chopped carrot tops (or parsley / coriander
  • 2 tsp oregano
  • 1 tsp sweet paprika (when I ran out normal paprika works just as well)
  • 1/2 tsp crushed chilli flakes
  • 1/4 tsp cumin (I ground them)
  • 1 minced garlic clove
  • 1/4 cup virgin olive oil
  • 1/4 cup white wine vinegar
  • 1 tsp salt
  • ground pepper
Method:
This is the simple bit ... Mix all the ingredients together!
Eat and enjoy in whatever way you fancy. I particularly like it with crusty bread, but it was also divine as a topping on a pan fried tuna steak.


Sunday, 17 May 2020

Fruited Apple and Almond Tea Loaf

This recipe is one that I tore out of a Waitrose magazine a year ago and it's taken me this long to get motivated enough to actually make it. I wish I hadn't waited so long as it's delicious and definitely on my regular bake list.  One word of warning: if you're as spontaneous a baker as me please be aware that you need to allow time for soaking the fruit before you start. I was all set to bake for VE Day and ensured I had all the ingredients available but it wasn't until I set out to make it in the morning that I realised I should have soaked the fruit overnight. I compromised by soaking for four hours instead, and it turned out fine but maybe I could have had an even more succulent loaf if I'd been better prepared.  


I apologise that this is an inadequate photo but we'd eaten nearly all of it before I thought that I would need a photo to share this amazing recipe with all of you!

It supposedly serves 10 (possibly tiny fairy people with minuscule appetites!)
Allow cooking time of 1 hour 30 minutes.

Ingredients:

  • 200g mixed dried fruit
  • 200ml strong, freshly made English Breakfast tea, tea bag left in
  • 30g salted butter, melted (plus extra to grease)
  • 175g self-raising flour, sifted
  • 150g demerara sugar, plus 2tsp for the top
  • 1 tsp ground mixed spice
  • 85g ground almonds
  • 1 braeburn apple (about 150g), skin on, 1/2 grated, 1/2 sliced into thin wedges
  • 1 large egg, beaten
  • 2 Tbsp milk
Method:
  • Put the dried fruit and tea in a bowl. Cover and leave until plumped - about 4 hours, or preferably overnight. 
  • Grease a 900g loaf tin; line with baking parchment. Preheat the oven to 160*C. Drain the fruit over a bowl; reserve the tea and discard the tea bag. Put the flour in a large bowl; stir in the sugar, spice, almonds and a pinch of salt.
  • Add the melted butter, soaked fruit, grated apple, egg, milk and 2 Tbsp of reserved tea and stir into a thick batter. 
  • Spoon into the tin and level the top a little. Dip the apple slices into the leftover tea, scatter over the cake and press in a little, then sprinkle over 2 tsp sugar.
  • Bake for 1 hour and 30 minutes, covering with foil for the final 20 minutes if the top is browning too much. When ready, the cake will be risen and golden and a skewer inserted into the middle will come out clean or with just a few damp crumbs.
  • Cool in the tin for 30 minutes and then lift out using the paper, and cool on a rack. 
  • Serve warm or cold, spread with butter if like.
We found it was perfect as it was and did not need butter.
Give it a go and I hope you enjoy it as much as we do.